A while back a wrote a blog about getting Repeating Section Data from a Nintex Workflow Cloud form to a list in SharePoint Online. I wanted to expand upon that use case and take that same data and add it to a document using the Generate document action in Nintex Workflow Cloud. The reason for this is because I get a lot of questions around “What else can I do with the data? Can I create an invoice after some lookups and calculations?” The simple answer is, yes! So, let’s look at how we can easily accomplish this.
The Form
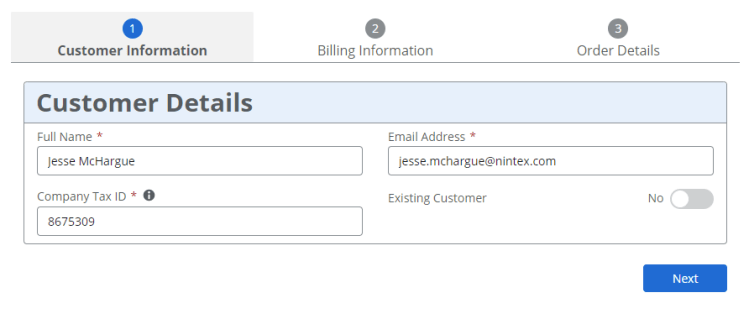
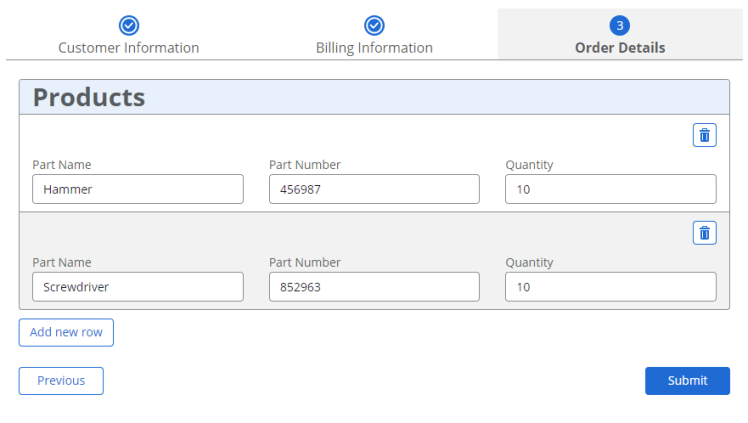
If you followed along on the last blog, I am going to use the same form and workflow that I built out there. If you do not, don’t worry, you can use this approach with any form where you have a repeating section and want to add it into you document generation. I went ahead and added a few more controls on the form to collect some “customer data”. See below on what was added.

The Workflow
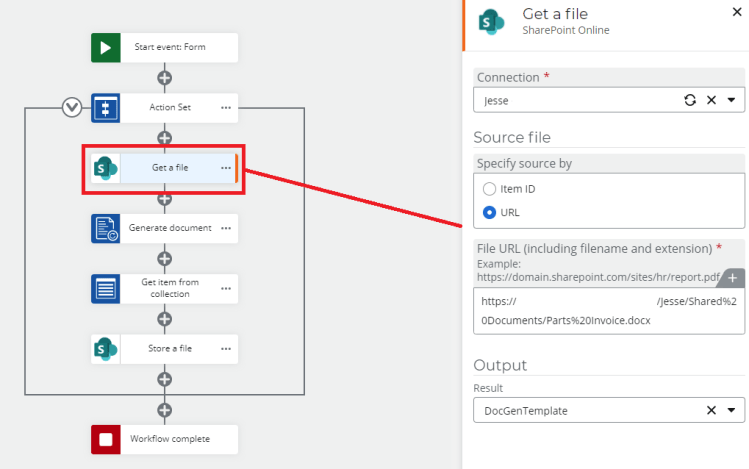
Once the form is submitted, it is off to the workflow! I removed the actions that added the data to the SharePoint Online list for now so that we can focus on just the document generation. Perhaps we will go back and add everything together to see a full, end-to-end, use case. Another blog for another day! For now, we need to get the document template that we will be injecting all our data into. I am using a SharePoint Online library to house my document, but Nintex Workflow Cloud also has out of the box connectors for Google Drive, OneDrive for Business, Dropbox, and Box if you would rather leverage one of those. Since I know where my template is stored, I just need to configure the action with the URL of the document and store it in a variable within my workflow for later use.

Now that I have my template, I need to inject the data that I collected from form and any other data I queried along the way. When configuring the Generate document action, I need to select which type of generation I need:
- Single PDF
- Separate PDF
- Same file as the template (.docx, .pptx, or .xlsx)
Next, select the template variable that you pulled in from the previous action and select the Generation order. You can have multiple templates and generate them in any order that you require. After that, give your output a name. I suggest making it dynamic so that it is unique to the workflow instance that is executing the action.

Lastly, we need to store all the generated documents into a collection variable so that we can easily perform further actions with the document. Perhaps we want to email it to someone as an attachment, or route it for approval, or e-signature.
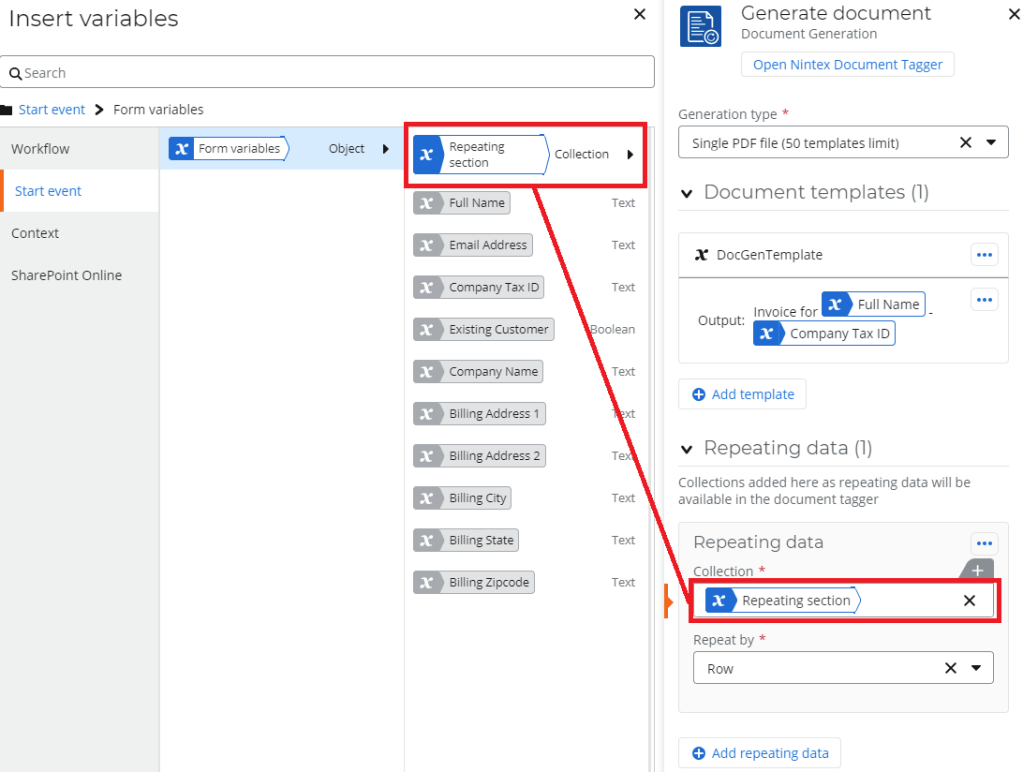
Before we move on to the next action, we cannot forget to configure the key piece to all of this, the repeating section data! To do this, we click on the “Add repeating data button” and then navigate to our repeating section under the Start event section of our variables. You have a few options on how the repeating data can be repeated; row, table, or section.
- Row – Will repeat the collection of data as individual rows within a single table
- Table – Will repeat the collection of data as individual tables
- Section – Will repeat the collection of data as individual sections within a document
For this example, we will be repeating by rows. Once the repeating data is configured, we can open the template and the Nintex Document Tagger (at the top of the Generate document action) and begin to insert our data points. To do this, we simply click on the data in the tagger, which copies it to your clipboard, and then paste it into the document where it belongs. Below is a look at how I built out the template using the customer information to create a “Bill to” section as well as how the repeating section of the invoice was setup. Pay close attention to the Start tag as it is key to the repeating data.

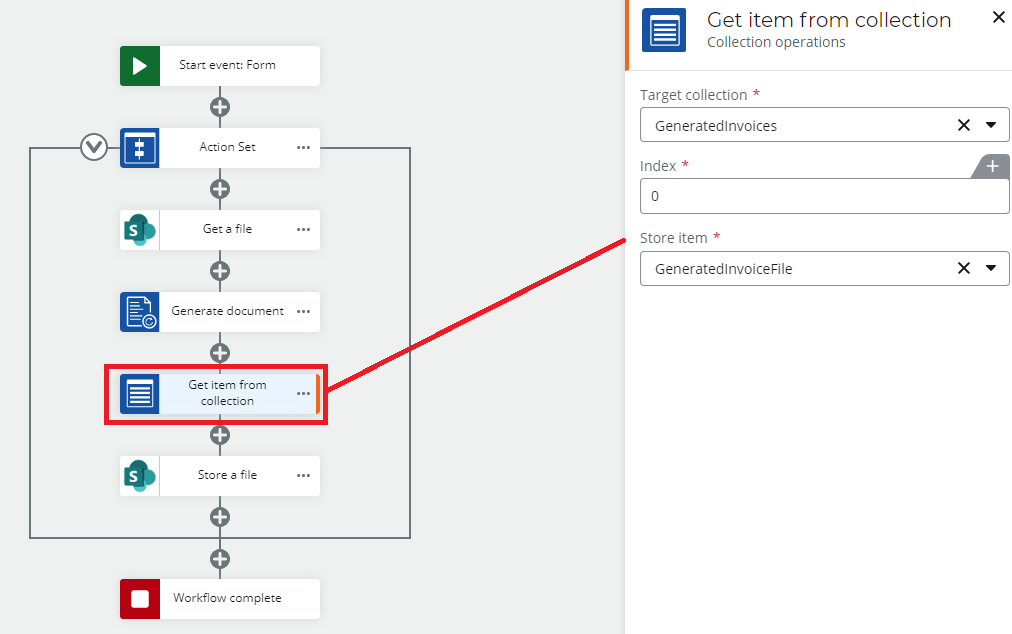
Once the template is tagged with all the required pieces of data and is formatted to your liking, we can setup the last two actions to store the file back into our SharePoint Online list. First, we must pull the file out of the collection that all generated files were stored in. Since we only have one, we can easily pull the file from index 0 of the collection. The reason why the files are stored in a collection is because there may be multiple documents that were generated. It also allows you as a designer to iterate through the collection and perform your required actions on each file within a single collection.
Once we have the file from the collection, you can do a multitude of actions such as send it off via email, route for approval, or even sent out to be e-signed. For this example, we are just storing it back into our SharePoint Online list using the Store a file action.

The Output
With everything in place, we can now fill out our form and see what is generated for us. Below is a snapshot of the generated documented with all my information along with a repeating section of the data from the form. You will also notice that the document title is dynamic based on the “Full Name” and “Company Tax ID” controls.

Final Thoughts
There are a lot of cool things you can do with document generation. Not only within Word, but PowerPoint and Excel as well. I want to expand this topic out a go a bit deeper next time to show how we could add lookups to our form as well as lookups within the workflow to pull in other data to add to our generated document. Even a signature from the signature control from the form! Let me know what else you want to see added to this scenario or document in the comments below and perhaps I will add it into the next article.

Leave a comment