Robotic Process Automation has been around for the better part of the last 20 years, but has really taken off and gained more attention in recent years. There are a lot of solutions out there for just about every possible need or business use case, however how do you decide what to go with or how much effort is involved in getting something built? I am not going to go into detail around all of the various options out there, however I do want to highlight how easy it is to get up and running with Nintex RPA. In this series I will be discussing how to setup everything from Nintex RPA Central to the Nintex Gateway, as well as providing steps on building out your first Nintex RPA Botflow, and then ultimately expanding the process to allow data to pass from Nintex Workflow Cloud to Nintex RPA through the Nintex Gateway. There is a lot to cover, so let’s dive in!
One thing to note before going to far, if you are looking for up-to-date information or latest release notes, please go to https://help.nintex.com/en-US/rpa/.
What You Need
In order to get started, you will need to following pieces as you follow along:
- Valid License Key – If needed, you can get a trial at https://www.nintex.com/trial/#rpa
- Latest Version of Nintex RPA Central and Nintex RPA Bot – These can be found in the Nintex Customer Portal or on the Product Release Notes Page in the Help Files.
We will get to the Nintex Gateway and Chrome Extension a bit later, but for now, this is all you need to get started.
Installing Nintex RPA Central
First, we need to start with Nintex RPA Central in order to activate the license and set the stage for Nintex RPA Bot. Log onto the computer where you wish to deploy Nintex RPA Central with an account that has local administrator rights. Keep this account handy as it will be setup as the administrator for RPA Central and will need to be used when activating the license. Launch the installer and select where you wish to install, then click install. Simple really. Nintex RPA Central does install Microsoft SQL Server 2017 Express along with .NET Core Runtime.
Once RPA Central is installed, you can enter your license key. If RPA Central does not launch automatically, you can manually start it from the Start Menu or from the Desktop shortcut. You should be presented with this screen:
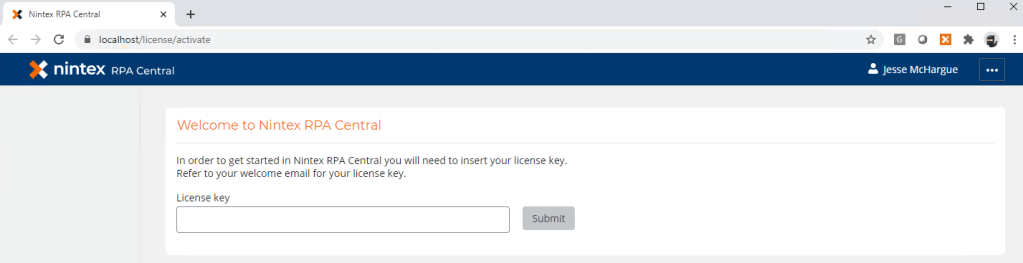
Here is where you want to paste your license key and click submit to activate your license. Again, be sure that the user that is logged in, is the administrator account that installed Nintex RPA Central. Another thing to be aware of is that Nintex RPA Central will communicate with its servers to validate the key. This means that the machine will need to be able to communicate out and it will not be blocked. For a list of endpoints, please check out Nintex RPA help documentation for update details.
Now that Nintex RPA Central is activated, you can assign it to a URL, add a port number, and select a security certificate. To do this, click on Settings in the top navigation bar and then License and Subscription side navigation menu. Click on the ellipsis next to the Nintex RPA Central URL (defaulted to http://localhost).

From here, you can set the hosted URL, add a port, and select your security certificate. When updating the URL, keep the new URL handy as it will be needed to connect Nintex RPA Bot to Nintex RPA Central. For more details, check out Nintex Help files.
Install Nintex RPA Bot
If you do not have Nintex RPA Bot already downloaded, you can go to the Dashboard within Nintex RPA Central and click on the Bots side navigation menu.
Click on Add Nintex Bot in the upper right corner and then the blue Nintex Bot button to download it. Once downloaded, click to run the installer.

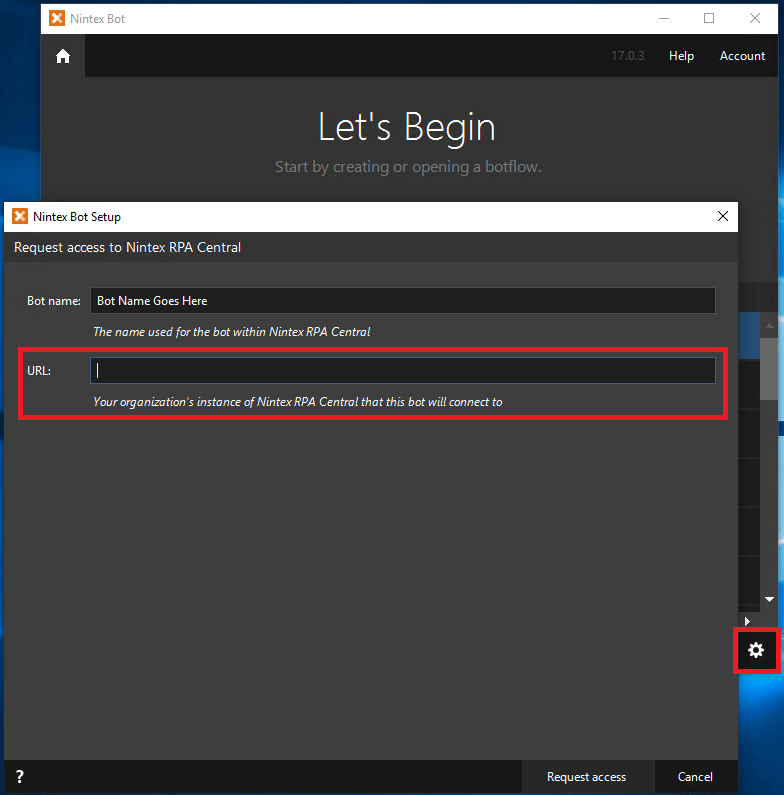
When installing Nintex RPA Bot, you can update the directory where it is installed. Also, .NET Framework and MS Access Database Engine 2016 will be deployed during installation. For more details, check out the Product Release Notes. Once installed, Nintex RPA Bot will start and you will need to provide the URL for your installation of Nintex RPA Central. This can be done by clicking the gear in the bottom right corner of Nintex RPA Bot. Simply give your bot a name and provide the URL to Nintex RPA Central and click Request Access.
Back in Nintex RPA Central, click on the Bots side navigation menu to see your list of bots within your environment. Find your newly requested bot and click on the ellipsis for that machine to grant access. That’s it! You can now start building automation with Nintex RPA.
Final Thoughts
Installing Nintex RPA Central and Nintex RPA Bot is straightforward but there are a few things to be aware of while setting everything up. Here is a quick list of common things that I see a lot and you should be aware of:
- The machine Nintex RPA Central is being deployed to needs to be a part of the domain and on the network
- The machine needs to be able to communicate out to Nintex to validate license keys
- Administrator that installed Nintex RPA Central needs to be the user that activates the license
- Click here for a full up-to-date pre-installation checklist

Leave a comment