If you are using SharePoint Online tasks, you have probably run into the need to have users attach additional documents that are related to the task. While these attachments will be stored with the task, many times there is a greater need to attachment them to the original list item. This allows for all the associated documents and attachments to be together on one item rather than on related task items in separate lists. Let’s look at how we can achieve this in a few steps using Nintex.
Getting Started
Before we dive in, be sure that you have access to a Nintex Workflow Cloud (NWC) tenant. If you do not have one today, you can go to the Nintex and grab a free 30 day trial. The reason we are using Nintex Workflow Cloud is because it is a simple four (4) step workflow that is used with any of you existing workflows in Office 365. We are also going to use Nintex Workflow for Office 365 on the list that will generate the task.
SharePoint Online
For the SharePoint Online piece, you will need to have a list where you are using a task. In your list workflow you will need to setup the workflow so that there is a Start workflow in Nintex Workflow Cloud action on the outcome you wish to use. For this example, I have it on the Approve outcome branch, but could very easily copy and paste the action onto the Reject branch.
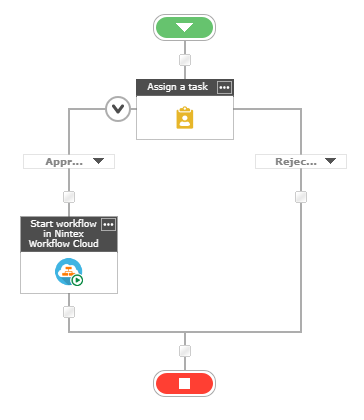
You will also need to create a workflow variable for the TaskID. The TaskID will be used to identify which task attachments to move into the list item in the NWC workflow. Now, let’s setup the Assign a task action in the workflow. Configuring the task action is straightforward, but I want to focus in on the TaskID section towards the bottom of the action. This is where you want to store the ID of the task that is going to be generated.

Once the rest of the Assign a task action is configured, save it and we can move on. At this point, we have not created the workflow in Nintex Workflow Cloud, so we will need to go do that. Be sure note where your tasks (task list name) will be created, as that will be important later. Save your workflow in O365!
Creating the Nintex Workflow Cloud Workflow
In Nintex Workflow Cloud we will want to create a new workflow. For the start event, we will select Component Workflow, which allows us to call this workflow from O365. Let’s setup our variables to match the data that we will be getting from the workflow in O365. You will need at least the following:
- ContextItemID – Integer
- TaskID – Integer
You may want to pass more data, but to accomplish the moving of the task attachments, this is all we will need. Here is a look at the workflow and the steps needed:
- SharePoint Online > Get attachment names
- Logic and flow > Loop for each
- SharePoint Online > Get attachment by name
- SharePoint Online > Add attachment to an item
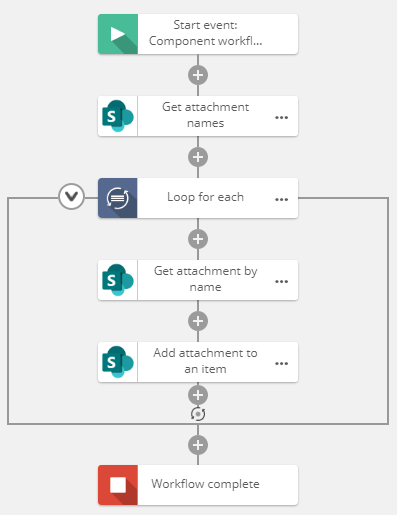
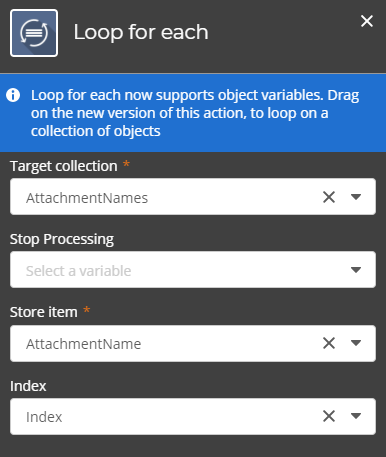
Let’s step through each of these actions. First up, the Get attachment names (1), is where we will target the item with the TaskID in the Workflow Tasks list and get the collection of AttachmentNames. I also store the NumberofAttachments just in case I need it in the future. Next, the Loop for each (2) item in the collection action is to loop through the collection of attachments and store the AttachmentName in a variable one at a time. Now that we have the attachment name, we can Get attachment by name (3) from the Workflow Task list by matching on the TaskID and the AttachmentName. Here we will store the result in a file variable called AttachmentToMove. Lastly, we Add attachment to an item (4) by targeting the list name where the Context Item is matching on the ContextItemID. Everything within the loop will execute each time for every item in the collection, or in other words, for each attachment on the task item.

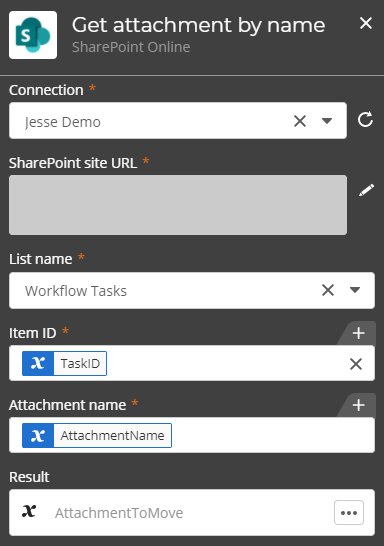
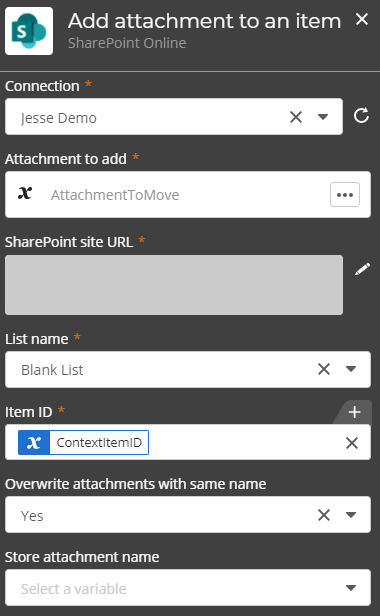
For all your SharePoint Online actions, you will need to make a connection into that tenant. Once the connection is made, the action will ask for the SharePoint site URL. This will be the URL for the site that the list or workflow task list resides on. From there, simply select the list name from the drop-down and configure the required pieces. Once you have the workflow all setup and configured, go ahead and publish it to see the URL with the token needed to call it. It will look something like this:

Back to SharePoint Online
Last bit is to update the Start workflow in Nintex Workflow Cloud action in O365. Paste your URL from the workflow you just created and click connect. Once connected, you should see the variables that will be passed to the workflow via the web call. These will need to be configured but are straightforward. One is the Item ID of the current item the workflow is running on, and the other is the TaskID that we created and are logging in the Assign a task action. That’s it! You are all set now and any task attachments that are added to the task item, will be moved to the context list item.

Final Thoughts
Through some simple steps, we can easily move SharePoint task attachments to the list item the task is associated to. This make keeping track of attachments and supporting documentation easy as they will always be on one item. We also built this process with Nintex Workflow Cloud, which opens the door to a lot of other possibilities when it comes to pushing and pulling data into various other platforms. Imagine if we had to push these attachments into Salesforce or do some sort of document generation from these. With Nintex Workflow Cloud, each of these scenarios are achievable with ease.

Leave a comment