We always want to make intelligent forms for our users, and one way to do that is to auto populate as much on a form as possible. This reduces the amount of time a user spends on a form as well as increases data accuracy. Win-Win all around! How can we do this within Nintex for Office 365? Quite simple.
TL;DR – Use the lookup function.
This approach will be for the Classic and Responsive designer that Nintex offers. If you are looking for how to do this in the New Responsive designer, check out this video. I will post a guide on this approach soon.
For this scenario I am going to be looking up some employee data that is in a SharePoint list. Perhaps I need to build a request form and want to pull in a user’s name and department based off of their Employee ID. We can absolutely do that with Nintex Forms. Here is my set of data:

Now let’s build out the form on our request list. For this, I am going to collect all of the same data points. I am going to set them as text fields, but rather than having my users enter all of the information, I am going to have them select their Employee ID from a drop-down on the form. If the user needs to change what was auto populated, they can still do that as we are not using Calculated Value controls for this.
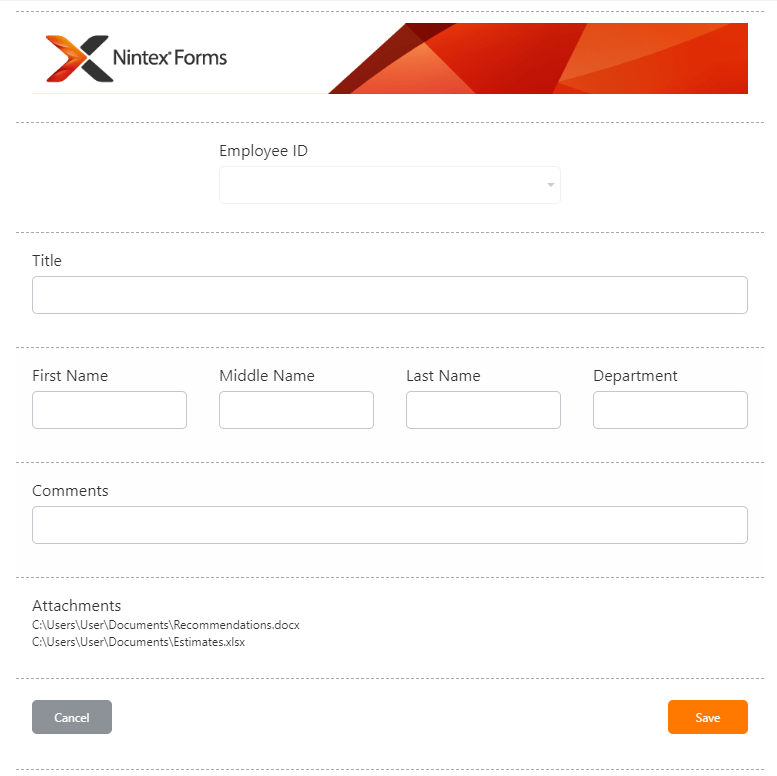
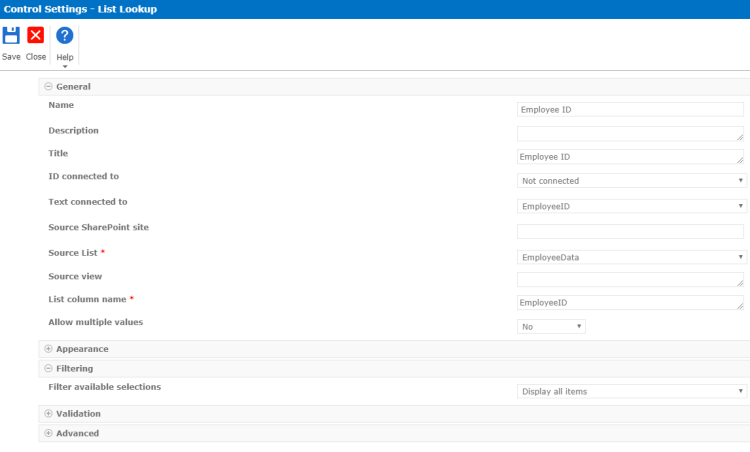
The Employee ID is what will drive the rest and auto populate the form. Be sure to connect this List Lookup control to a column in your list so that you commit the data back to the list! Here is how that control would be setup for this scenario:

For the rest of the controls, we can use rules and when the lookup control has data, we can set the value using another lookup function. Confused? Not to worry, it is simple. In order to add a rule to a control in Nintex Forms, simply select the control, let’s select First Name, and click on Add Rule in the top ribbon. Here is where we want to build out the logic to lookup the First Name data from our EmployeeData list based off of the EmployeeID we selected in the drop-down.
The rule will be triggered when the Employee ID control is NOT NULL OR EMPTY. This means that the form will not auto populate until a selection has been made. This also means that each time the selection changes, it will trigger another lookup, thus updating the data!
Now, time for the lookup. When the rule is triggered, we want to set the control to the result of the lookup function. The First Name, in this case, will come from our EmployeeData list, using the Employee ID as our key. The lookup function is this:
lookup("EmployeeData", "EmployeeID", parseLookup(Employee ID), "First Name")
Let’s take a moment and break the lookup function down to something a bit more manageable.
“EmployeeData” – This is the list where we want to lookup data from
“EmployeeID” – This is the column in the lookup list that we want to filter on
parseLookup(Employee ID) – This is the value we want to filter on in the above column. This is the lookup control that is on the form. Why use parseLookup() and not just the control? When using a lookup control, the selected value also has the ID appended to it. For example, if we selected Employee ID 55555, the resulting data would look like this: “1;#55555”. We just want the value, not the ID, so we use parseLookup().
“First Name” – This is the column we want to be returned from the list we looked up and filtered. As you can imagine, this is the piece that would change for each control you want to auto populate.
If you want to read more on the lookup function, check out the Nintex help files.
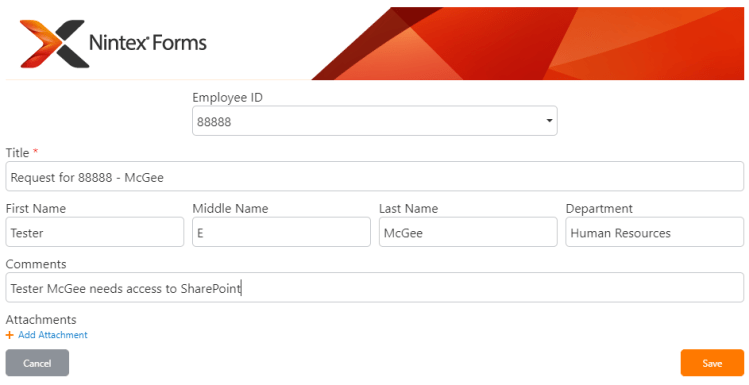
From here you can easily duplicate your rule, add it to another control, and change the lookup function to return the desired data. Once you have everything setup, test it out in the preview mode that is available in Nintex Forms. You should see something like this:
Now, keep in mind that since we used text controls and rules to auto populate and not Calculated Value controls, we allow for changes when needed.

Once submitted, the data can be made visible within the request list that we created earlier.

Final Thoughts
Why use Single Line Textbox over Calculated Value? Using a SLT control allows for changes to the data, whereas a Calculated Value control is read only. Both have their uses and can easily be setup. One could even setup the SLT to be read only by setting “Enabled” to “No” in the control settings. It would result in something like this:

Can this approach be used in SharePoint on-prem? Yes, absolutely! Even using the Classic forms designer.
Want to take this a bit further? You could setup the form to auto populate based off of the current user! There is a section called “Common” when inserting reference into the rules. There is a reference to current user (Display Name, Email, and Login ID) that can be used.
I hope this has been helpful and pointed you in the right direction when it comes to auto populating your Nintex Forms in Office 365.
Let me know your thoughts in the comments below!

Leave a comment